Make Tonight Homemade Pizza Night!
I know some people who say that pizza is one of those dishes that's always better when you dine out. I respectfully disagree! While that might be true for topping-laden old-school American pizza, we've been successfully making some pretty wonderful Italian-style pizzas right here at home. Unfortunately, we lack a wood-burning pizza oven in the backyard (someday…), but we get some good results in a regular home oven with a little preparation and a few tricks.
As for tomatoes, I often use good quality canned plum tomatoes pureed with a little olive oil, salt, pepper, and a clove of garlic. If I have really good fresh tomatoes, especially the ones that come out of our garden in the summer, I'll often just slice them thinly or puree them on their own.
Quick Pizza Dough
The refigerated pizza dough sold by Trader Joe's is actually very good, and we use it all the time, especially if we want to make pizza on the spur of the moment. Making your own pizza dough isn't all that challenging, though, so if you have the time, go for it! The results are usually quite good, and you can even freeze extra dough to use later.
To make pizza dough you'll need:
- 3 cups flour (all-purpose or bread flour)
- 1 envelope (.25 ounces) active dry yeast
- 1 teaspoon sugar
- 1 cup warm water
- 2 teaspoons kosher salt
- 2 tablespoons extra virgin olive oil
- Extra flour or water, if needed
If you have a stand mixer, pour yeast, sugar, and warm water (100–110ºF) into the bowl and gently mix together with a dough hook attachment until yeast and sugar are dissolved. (Make sure the water isn't too hot or you'll kill the yeast.) Normally, dough recipes tell you to let this mixture sit until it becomes foamy (about 10 minutes), but an astute Marin Mommies reader pointed out that this really isn't necessary. I tried it and it's true! Just mix it all together and let it go.
Now add the salt and olive oil and start mixing at the lowest speed. Gradually add the flour until the dough comes together. Once the flour is all incorporated turn the mixer speed up a little higher and mix until the dough comes together. If it's too dry and crumbly, add a little more water a tablespoon or so at a time. If it's too wet and sticky, add a little more flour.
If you don't have a mixer, dissolve the yeast, water, and sugar in a small bowl and let sit as above. Put the flour in a large bowl and make a well in the center, then pour in the yeast mixture, the olive oil, and the salt. With well floured hands, mix together the ingredients until they come together, adding a little more flour our water if needed as above.

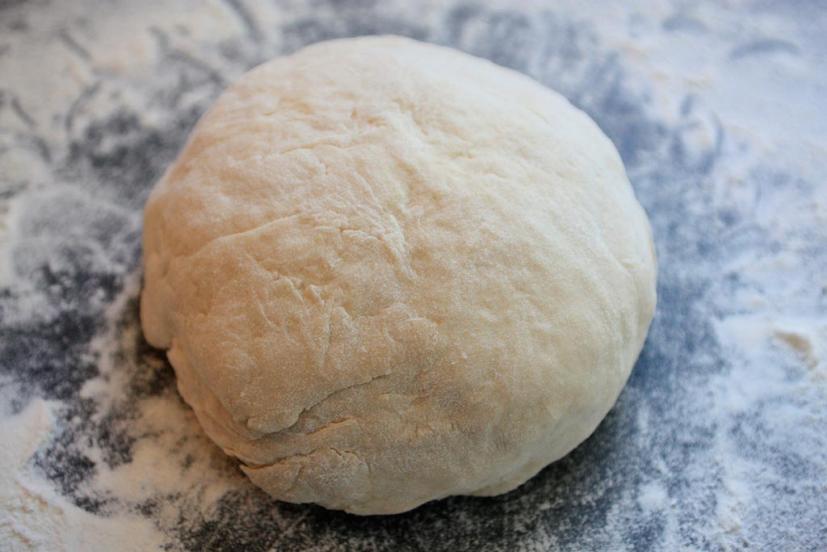
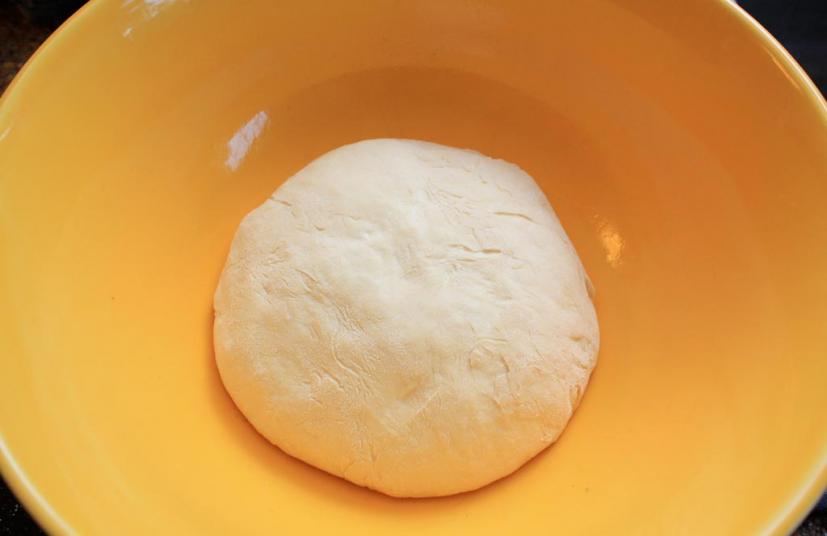
Turn the dough out onto a lightly floured surface, fold the dough over on itself a couple of times, and knead it until it's soft and elastic. Form the dough into a ball and place in an oiled bowl. Cover the top of the bowl with plastic wrap or a damp kitchen towl and leave it in a warm place (at least 72ºF) until the dough has doubled in size (about an hour). You can also put the dough in the refrigerator and let it rise overnight.
While you're waiting, preheat your oven at its highest setting, usually 500–550ºF, for at least an hour. If using a pizza stone, put it on the top rack in the oven and let it heat up at the same time.
Punch down the dough (smush it to knock some of the air out of it), and roll it into a log. You can divide it into two or three pieces, depending on how thick you like your pizza crust; form each piece into a ball. On a floured surface, roll out each ball into a disk. You can stretch them with your fingers, too. Each of our three pizzas is usually about 10 to 12 inches in diameter—the perfect size to fit on our pizza stone, too. I often turn the kids loose and have them roll out the crusts. It doesn't matter if they're in perfect circles—they should have some character!

Pizza Toppings
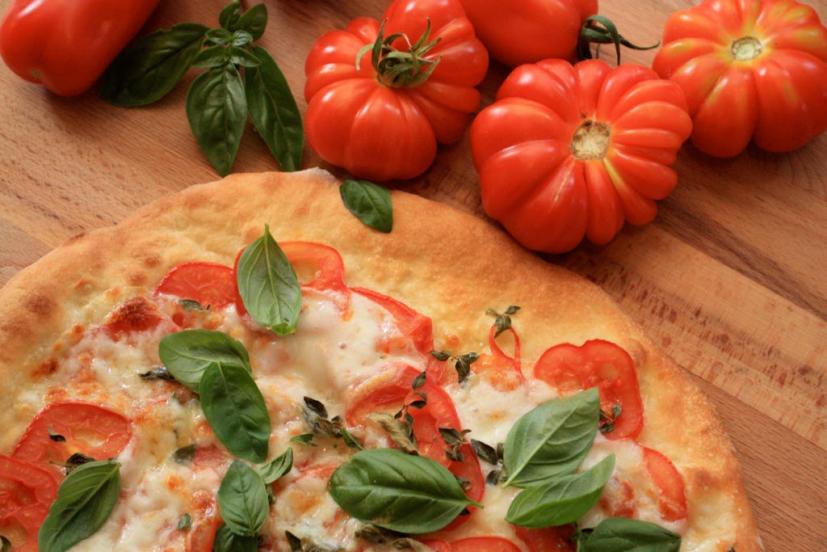
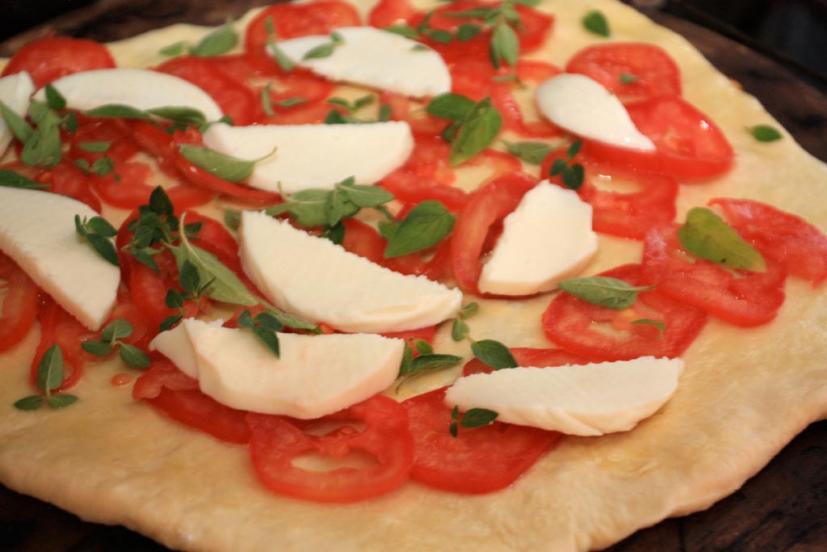
When we make pizzas at home, we tend toward the traditional, mostly because they're hard to mess up and they're delicious. When it comes to the amount of toppings, less is better. Too much cheese, tomato, etc. will make your pizza soggy, and you'll probably overbake your crust as you wait for the toppings to cook. Use just barely enough tomato sauce or tomatoes to cover the crust, and add cheese sparingly, especially if you're using fresh mozzarella, which has a high moisture content. Add delicate herbs like basil after the pizza comes out of the oven.
Some of our favorites:
- The classic Neapolitan style Margherita pizza is always a hit in our house. Top with pureed or thinly sliced plum tomatoes and fresh mozzarella (about 3 ounces or so) ,and a sprinkle with a little salt, drizzle with some good extra virgin olive oil, then add fresh basil leaves either before or after you bake the pizza. We sometimes toss on a little fresh oregano from our herb garden before baking, too.
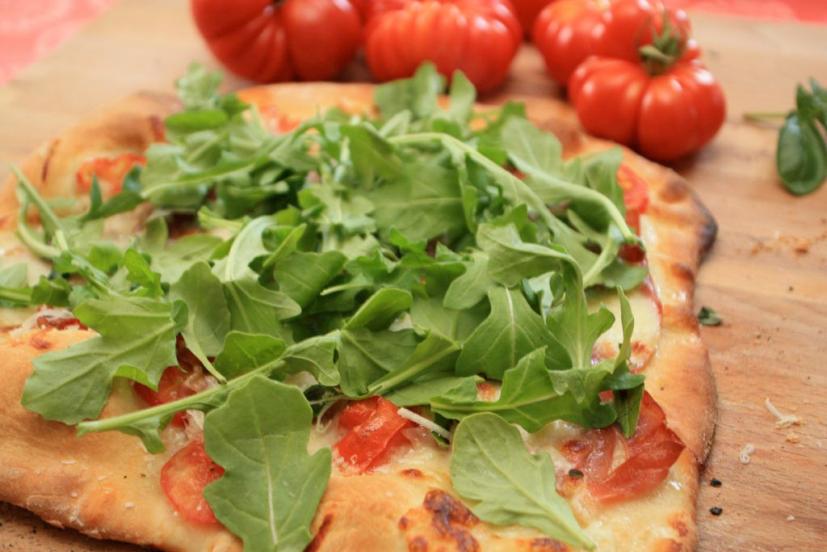
- Prosciutto and arugula make for a pretty fantastic pizza. Make pizza as above, but layer on 3 or 4 slices of prosciutto and dust with some freshly grated parmesan cheese. Bake and then pile on arugula when it comes out of the oven. My daughter call this "salad pizza".
- For tomatophobic diners, make a white pizza. Brush your crust with olive oil and add some cheese and other toppings; try black olives and fresh rosemary. This is surprisingly good.
- Toss some shredded dinosaur kale in a bowl with olive oil, salt, and pepper. Spread this on your pizza along with some fontina cheese, a couple thinly sliced or minced garlic cloves, and some diced pancetta (optional).
Baking Your Pizzas
Getting the pizzas into the oven and onto the pizza stone intact is for me the biggest challenge. While the pizza dough recipe seems a little complicated, it's actually easier to make than it looks. In truth, getting the pizza in the oven is harder! (Of course you can bypass all this by just cooking your pizza in a baking sheet, metal pizza pan, or even a cast-iron skillet.)
The secret to getting your pizza on the stone in one piece is working quickly. Have all your toppings cut up and arranged close at hand, and be ready to spring into action once the dough is rolled out. If you have a wooden or metal pizza peel, great! If you don't, no need to worry—I just use the back of a metal baking sheet.
Spread some flour on your work surface (this helps the pizza slide off onto the stone), and gently place your pizza crust on top of it. Working quickly, brush the dough with some olive oil and arrange your toppings. This is a great time to have the kids help, too, especially if the toppings are already portioned out so they don't overload the pizza.
When you're done, open the oven, slide out the rack with the pizza stone, and then carefully slide the pizza onto the stone. You can gently tug at the dough edges with your fingers to get it moving. Use a sort of shaking movement to gently coax the pizza onto the stone. You might need to practice this a little, but it doesn't take long to get the technique down.
Bake your pizza for approximately 10 minutes, or until crust is browned and puffed and cheese is melted and bubbly. Now (and this step is optional but it works really well), turn on the broiler! Carefully watch your pizza and let the high heat of the broiler do its work for about a minute. This makes the crust extra bubbly and charred in places—remarkably like the ones from a high-temperature wood-burning oven.
Did I mention you need to watch the pizza? A moment of inattentiveness can turn your pie from culinary triumph to inedible disaster. You need to observe and turn the broiler off when the pizza looks like it's good to go.
Carefully remove from the oven and let cool a few minutes before serving. Meanwhile, you can get another pizza ready for the oven. Buon appetito!