Create Your Own Heart-shaped Crayons for Valentine's Day
Creating these beautiful DIY custom crayons is a fun craft project that everyone in the family can do. This project really takes minimal effort, so it's perfect for all ages, and the results always exceed our expectations! These make a fun and pretty gift for Valentine's Day, as well as neat party favors. They even look great as decorations around the house.
If you have kids (and you probably do if you're reading this article), you most likely already have the materials for this lying around the house, in the form of broken crayons. So the first step in this project is to round up all the old crayon bits and pieces in your house. If your home is like ours, this should not be very difficult.
Of course you can also go out and buy a box of crayons just to make this craft, since they're not that expensive. (Once you make a batch of these and see how great they turn out, you'll find that you're always careful to bring home the leftover crayons that restaurants give you with the kids' menu.)
You'll need a heart-shaped muffin or baking pan in which to mold the crayons. Either non-stick metal or silicone will do.
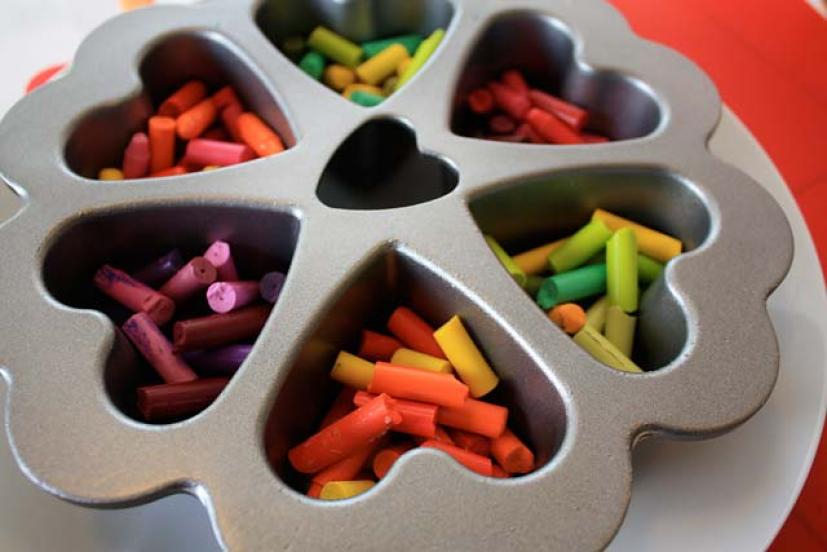
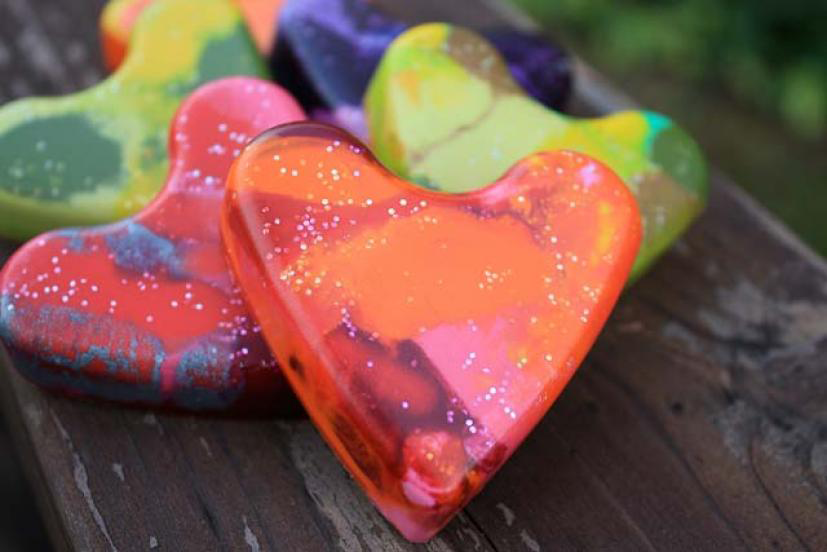
We made a half-dozen heart crayons, each about a half inch thick, and used approximately 24 donor crayons. We took pieces of crayon and sorted them by color, trying to get a nice combination of hues for each one—greens and yellows, reds and pinks, yellow and orange, and various shades of purple. You can combine any colors you like—just use your imagination.
We found some silver glitter left over from another project in the craft drawer, and my daughter sprinkled some on the bottom of each cup in the pan. You don't have to add the glitter, but a light sprinkling of the stuff give the finished crayons a really neat effect. We then filled each cup with crayon pieces, breaking up the larger pieces as needed, until each cup was about 2/3 full.
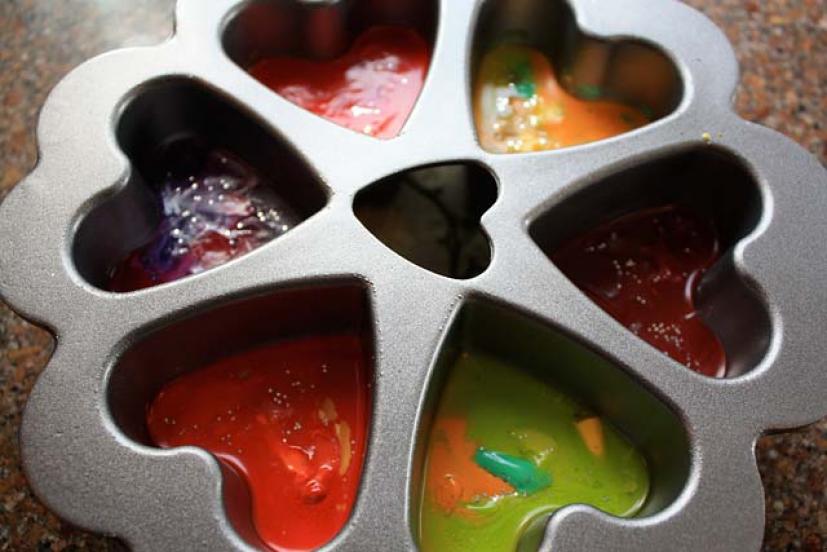
Preheat your oven to 200ºF, and when it's ready, slide in your muffin pan. Keep them in there for 12 to 15 minutes or until the crayons are just melted. Some of the crayons may seem a little lumpy, but they'll continue to melt when the pan is out of the oven. Above all, you don't want them to burn. If they turn brown, you've heated them for too long.
Remove the pan from the oven slowly to avoid spilling the melted wax, and let it cool in a safe place. Needless to say, keep little hands away from the pan until it's thoroughly cooled.
Let the crayons cool for about 30 minutes or until set, then remove from the pan. If they stick, put the pan in the freezer for another 30 minutes or so and they'll pop out with no problem.
If you don't have a heart-shaped pan, don't worry—these even look great made in a regular old muffin tin. In fact, my daughter set up another batch in a a mini-muffin pan, with fantastic results.
Have fun with this creative and easy project!