Get Baking with Sourdough
The San Francisco Bay Area is known as the home of sourdough bread, and the word "sourdough" conjures up visions of '49ers cooking up bread and pancakes over the campfire during the California Gold Rush. Part recipe and part science experiment, sourdough baking is a fun — and delicious — project for the whole family.
Sourdough bread, especially when made with whole-grain flour, is healthier than breads made with commercial yeast. It's high in protein and lower on the glycemic index than conventional bread, contains antioxidants in the form of lactic acid, and can even be eaten by some individuals with gluten intolerance. Sourdough bread is made with only four ingredients: sourdough starter, water, salt, and flour, so you know exactly what's going into it.
Homemade sourdough is the perfect thing for sandwiches, toast, serving alongside a hot bowl of soup, and even just snacking, and we don't need to run out to the market when it's gone. As long as we plan ahead a little, we have fresh hot bread in the kitchen. Plus, a loaf of bread baking in the oven makes the house smell fantastic!
Making a Sourdough Starter
To bake with sourdough, you'll first need a sourdough starter. What is a sourdough starter, exactly? It's basically dough fermented by wild yeast and bacteria that live in the air around us. You can buy sourdough starters at grocery stores and online, but it's really easy to create one from scratch. Make a paste of flour and water, leave it out on the kitchen counter overnight, and eventually the microorganisms that create the starter get to work.
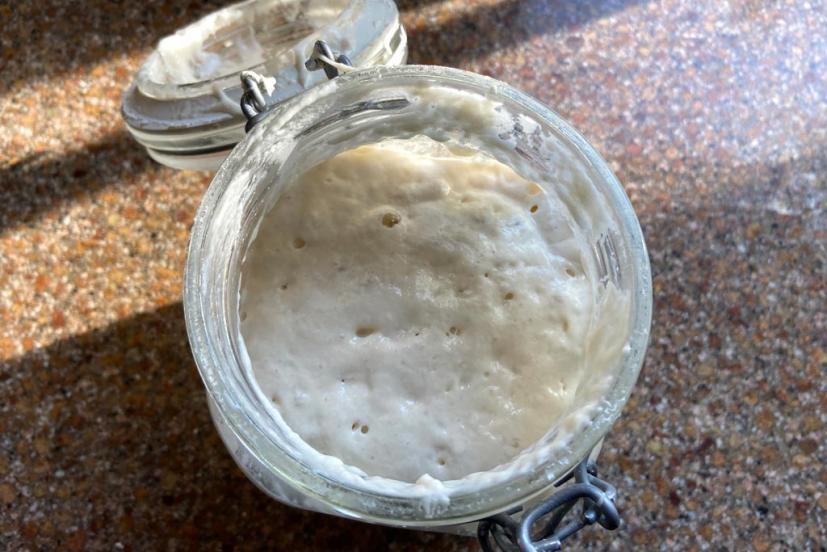
Our sourdough starter has been going strong since 2019. To create it, we followed instructions from the Exploratorium, which you get find here.
Once your starter gets going, you have ti feed it. If you keep it out on the counter at room temperature you'll have to feed it a flour and water mixture every 8 to 12 hours. If this sounds like too much work, don't worry! You can also store your starter in the refrigerator and feed it just once a week. Keep it going and you'll have the source for amazing sourdough creations on hand all the time. Boudin Sourdough in San Francisco has been using the same starter (or "mother") since 1849!
Bread Baking Equipment
You don't really need much in the way of special equipment to make sourdough bread at home, but there are a few items you have to have. A kitchen scale to weigh ingredients rather than measure them by volume is a real game changer, since flour can have a different density depending on the ambient temperature and humidity.
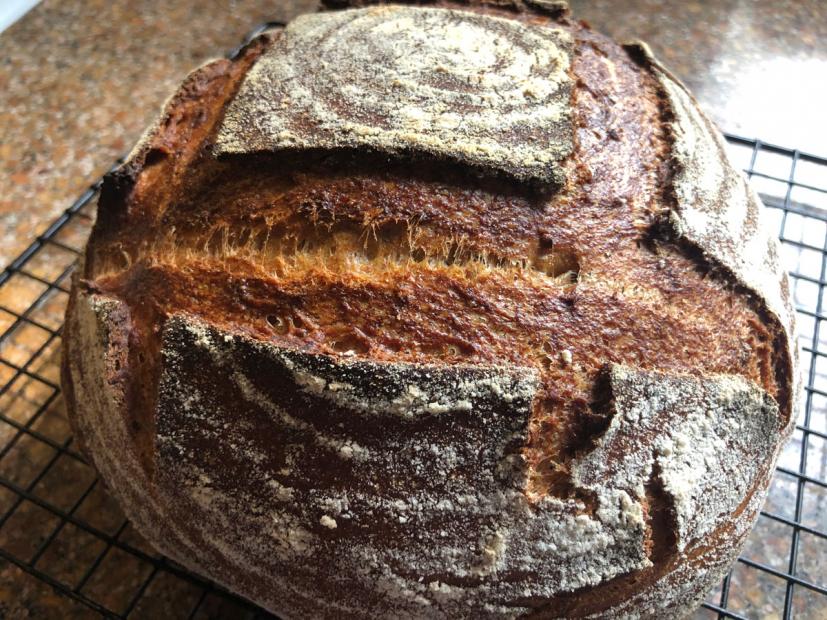
We've found that baking the bread inside a Dutch oven or clay baker yields a love with the crispy, crusty texture you associate with good, professionally baked sourdough. We use both an old Le Creuset enameled cast iron Dutch oven, with the plastic knob removed from the lid, and a Eurita clay baker, which gives us boules and batards, respecitvely.
Many bakers use a cane or wicker proofing basket or "banneton" to proof their bread. We have one and it works great, but a mesh strainer lined with parchment paper works fine, too. The banneton will give you the cool circular "artisan bread" pattern on your crust, too. You'll need a bread lame, sharp knife, or razor blade for slashing the dough before it goes in the oven, and that's pretty much it.
Baking No-Knead Sourdough Bread
Baking homemade bread can seem like a lot of work, but in our kitchen we like to trade time for effort and let the sourdough starter do all the work. No-knead sourdough bread couldn't be simpler to make, but you do have to plan it out in advance a bit. Essentially, by letting the dough do a slow ferment for 10 to 12 hours develops the gluten in the flour just like the process of kneading.
You mix together flour, salt, water, and sourdough starter in a large bowl, stretch and fold it a couple times, and then let it sit on the kitchen counter overnight. In the morning you give the dough another stretch and fold, proof it (let it rise a final time), and then bake it in a hot oven.
Our go-to no-knead sourdough recipe, which uses a 50/50 mix of white bread flour and whole-wheat flour, is based on the one on the Breadtopia website. We've actually found their recipe produces dough that's a little too wet, but the amount of water used depends on the type and quality of your flour and the humidity in your kitchen. Measuring ingredients by weight really works the best, so kitchen scale is a must-have tool. I've included approximate measurements by volume, too.
No-Knead Sourdough Bread
Ingredients
- 260g (about 2 cups) white bread flour (Trader Joe's and King Arthur all-purpose flour are fine, too)
- 260g (about 2 cups) whole wheat flour
- 10g (2 tsp or so) kosher salt
- 364g (1 1/2 cups) warm water
- 70g (1/4 cup) ripe sourdough starter
Directions
- Whisk together dry ingredients in a large mixing bowl.
- Dissolve sourdough starter in water.
- Mix water and starter mixture with dry ingredients until you get a rough dough. Make sure all the flour is incorporated and form into a ball.
- Let dough ball rest for 15 minutes and do a stretch and fold; this helps develop the gluten in the flour. with wet hands, grab one end of the dough and stretch it up, then fold it back on itself. (Video on Breadtopia will show you how to do this.) Wait another 15 minutes and do another stretch and fold.
- Cover dough in bowl with a plastic lid or plastic wrap and let sit at room temperature for 10 to 12 hours to bulk ferment.
- After bulk fermentation, do a coil fold: wet your hands and stretch dough out and let it fall back on itself in a coil. (Again, the Breadtopia video shows how to do this.)
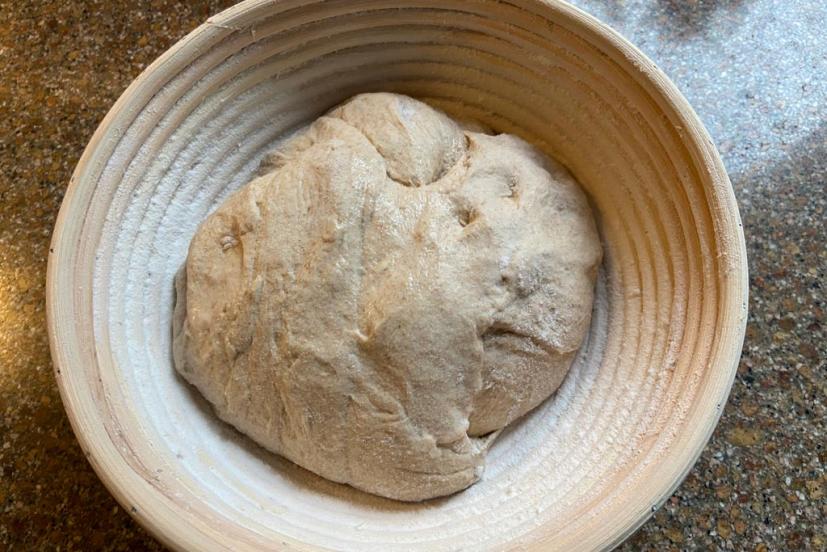
- Place dough in a proofing basket. Make sure you flour the basket well, and it doesn't hurt to dust the dough with some flour, too. I find that rice flour works really well for flouring the proofing basket. If you don't have a proofing basket use a bowl or wire strainer lined with parchment paper.
- Cover dough and let proof (second rise) in the basket for an hour to an hour-and-a-half. I usually find an hour is optimal.
- Preheat your oven to 500°F. If you're using a cast iron Dutch oven to bake your bread, preheat both that and the lid, too.
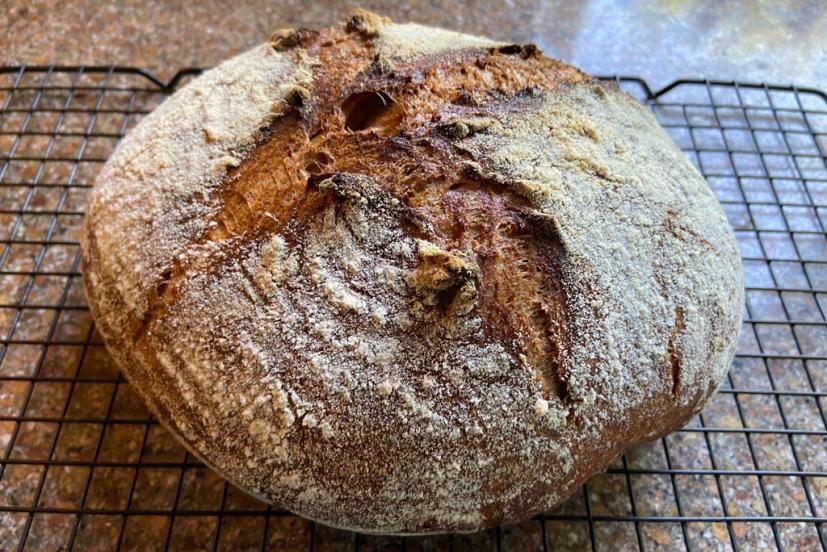
- Move dough from the proofing basket to the Dutch oven and cover. Bake for 30 minutes, then lower heat to 450°F, remove lid, and bake for another 15 minutes. If done, bread will sound hollow when tapped and the internal temperature should be about 200°F. You can just drop it in from the basket or place it and its parchment paper right into the Dutch oven.
- Let cool on a wire rack and enjoy!
One of the things you'll realize when you start baking sourdough bread is that you'll do a lot of experimentation to get the texture and flavor you like. This is totally OK, and even the loaves you regard as failures are pretty delicious. We've baked a few less-than-perfect loaves and they've all been edible! There are many other resources and recipes for sourdough bread online, so you'll have no shortage of different variations to try.
More Sourdough Recipes
When you're feeding your sourdough starter, you'll end up removing some of it each time, otherwise your starter will just keep getting bigger and bigger and bigger. Don't throw that "discard" out! You can make all kinds of amazing baked goods with it, all of which have that signature sourdough tang and an amazing texture. Our favorite thing to make with the discard is sourdough waffle or pancake batter — it's equally delicious either way. Here's the recipe we use, adapted from the one from King Arthur Flour:
Sourdough Waffles or Pancakes
Overnight sponge ingredients
- 2 cups all-purpose flour
- 2 cups buttermilk
- 1 cup sourdough starter discard
- 2 tablespoons sugar
Batter ingredients
- All the overnight sponge
- 2 large eggs
- 1/4 cup melted butter, cooled
- 1 teaspoon kosher salt
- 1 teaspoon baking soda
To make the overnight sponge, stir together flour, buttermilk, starter, and sugar in a large bowl. Cover with a bowl cover or plastic wrap and let it sit on the kitchen counter overnight.
In the morning, mix togther the overnight sponge, eggs, butter, salt and baking soda. Bake in a hot waffle iron as per the manufacturer's directions, or cook on a griddle for pancakes. Serve with butter and maple syrup for a real breakfast treat.
We get commissions for purchases made through links in this article.